
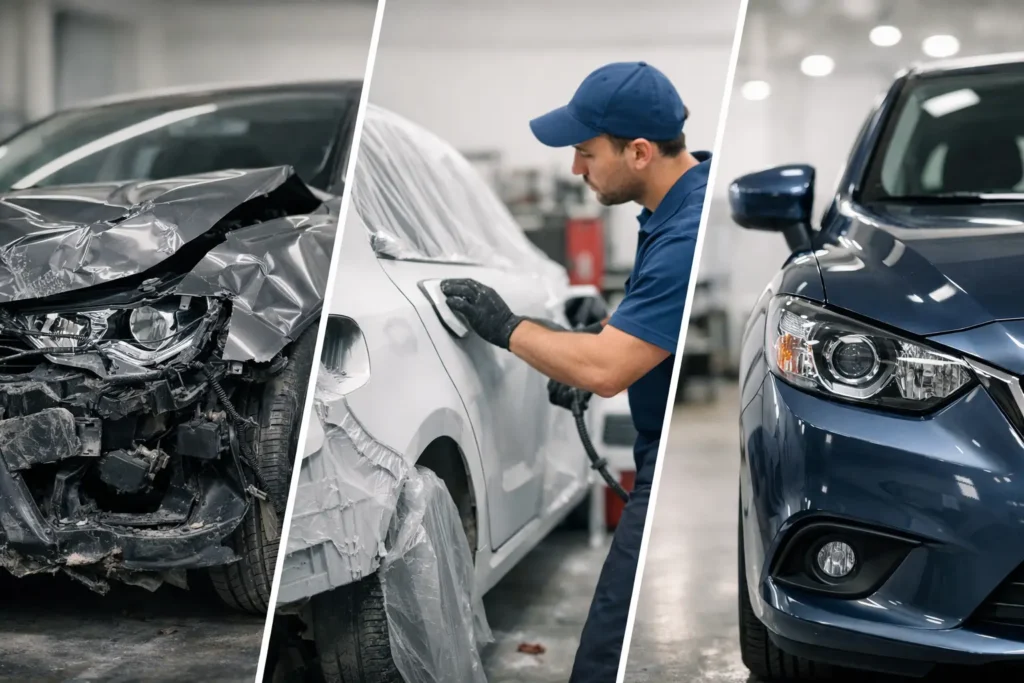
A collision can turn an ordinary drive through Cathedral City, Palm Springs, or Palm Desert into a week of questions: Is my car safe to drive? Will insurance cover it? How long will I need a rental? This guide to the collision repair timeline explains what happens after you bring your vehicle to a qualified body shop, why some repairs move quickly while others require more time, and what you can expect at each stage.
The honest answer is that no responsible shop should promise an exact completion date before inspecting the damage, confirming parts availability, and reviewing the insurance estimate. A minor bumper repair may take a few days. A vehicle with hidden damage, airbag deployment, or structural repairs may need several weeks. Clear communication makes that difference easier to manage.
What Determines a Collision Repair Timeline?
The visible dent or cracked bumper is only part of the story. Modern vehicles are designed to absorb impact, which can protect occupants but can also leave damage behind panels, under the vehicle, or within safety and sensor systems. The repair timeline depends on the extent of that damage and the steps needed to restore the vehicle to pre-accident condition.
Parts availability is often one of the biggest variables. Some common bumpers, lights, trim pieces, and body panels can arrive quickly. Other components, especially for newer models, luxury vehicles, foreign vehicles, or vehicles with advanced driver-assistance features, may be on backorder. A quality repair should not substitute an incorrect or poor-fitting part simply to shorten the wait.
Insurance authorization can also affect the schedule. An initial estimate is based on the damage visible before disassembly. Once technicians remove damaged parts, they may find additional repairs that were not apparent at first inspection. Those additional items, often called supplements, must be documented and approved before work can continue on the affected area.
Finally, the repair itself must follow the vehicle manufacturer’s procedures and applicable safety standards. Frame measurements, welding requirements, corrosion protection, paint curing, and sensor calibrations cannot be rushed without risking the quality and safety of the finished repair.
Guide to Collision Repair Timeline: The Main Stages
1. Towing, check-in, and the initial estimate
After an accident, the first priority is safety. If the vehicle is not safe to drive, arrange towing rather than taking chances with a damaged wheel, suspension, cooling system, or airbag system. At the shop, the team records the vehicle’s condition, gathers insurance information, and performs an initial visual inspection.
A detailed estimate identifies the repairs that can be seen at that point. It may include body labor, paint work, parts, mechanical items, and required diagnostic procedures. This stage can happen the same day or within a few business days, depending on the vehicle condition and insurer process.
The estimate is not a shortcut or a guess. It is the starting point for a proper repair plan. A trusted shop should explain what is known, what may need further inspection, and who will communicate with the insurer.
2. Insurance review and repair authorization
If you are filing a claim, your insurance company may review the estimate, inspect the vehicle, or use photos and documentation supplied by the repair facility. The time required varies by insurer, claim complexity, and whether there are questions about coverage, liability, or rental benefits.
You generally have the right to choose the collision repair shop that works on your vehicle. Insurance coordination can reduce administrative stress, but the repair facility’s responsibility remains the same: document damage accurately and perform the repairs needed for a safe result.
When supplements are necessary, they are a normal part of collision repair, not automatically a sign that something went wrong. Hidden damage frequently appears only after the car is disassembled. The key is prompt communication so you understand why the timeline or estimate has changed.
3. Disassembly and a complete damage assessment
Once repairs are authorized, technicians remove damaged exterior panels and related components to inspect what is underneath. A bumper that looks lightly damaged can conceal broken mounting brackets, damaged absorbers, cracked reinforcements, or issues with wiring and parking sensors.
This is often the point at which the repair plan becomes more precise. The shop can order any newly identified parts, submit a supplement when needed, and schedule the work in the correct sequence. Although this step may add time, it prevents incomplete repairs and costly surprises after the vehicle is returned.
4. Parts ordering and scheduling
A collision repair cannot move faster than the parts supply allows. Shops typically verify part numbers and availability after the complete assessment, because ordering too early can create returns and delays if hidden damage changes the repair plan.
In some cases, parts arrive within a day or two. In others, a specialty component may take considerably longer. Your repair adviser should keep you informed of significant delays and explain whether the vehicle is waiting for a single critical part or whether other repair work can continue in the meantime.
Rental vehicle assistance can be especially valuable at this stage. If your coverage includes rental reimbursement, confirm the daily allowance and time limits with your insurer. Even when a rental is not covered, asking early about transportation options gives you more time to plan.
5. Structural, body, and mechanical repairs
After the repair plan and parts are in place, the physical work begins. This may include frame or unibody measuring and straightening, replacement of damaged panels, dent repair, bumper and fender work, suspension repairs, and alignment-related work.
For a minor repair, this phase can be relatively brief. For a significant collision, technicians may need to restore structural points to precise measurements before installing replacement panels. Proper fit matters for more than appearance. It affects door operation, panel gaps, crash performance, weather sealing, and the performance of many modern vehicle systems.
Certified technicians use specialized equipment and repair procedures rather than relying on appearance alone. A vehicle can look repaired while still having unresolved safety concerns, which is why careful structural and mechanical work is worth the time it takes.
6. Paint preparation, refinishing, and curing
Painting is a multi-step process. Technicians prepare the repaired area, apply primer when needed, match the vehicle’s color, refinish the panel, and blend adjacent panels if required for a consistent appearance. Coachella Valley sun can make subtle color differences more noticeable, so color matching deserves careful attention.
Paint also needs appropriate time to cure. The process may involve controlled spray booths and bake cycles, but reassembly should not begin until the finish is ready. Rushing this stage can lead to defects in appearance or durability.
7. Reassembly, calibrations, and quality control
Once painting is complete, the vehicle is reassembled and checked. This includes reinstalling trim, lights, glass-related components, bumpers, and interior pieces removed during repairs. The final stage may also require wheel alignment, diagnostic scans, and calibration of cameras, radar, lane-departure systems, parking sensors, or other advanced driver-assistance features.
Not every vehicle needs every calibration, but shops should never assume that a sensor system is functioning correctly based only on a dashboard light. Final quality control verifies repair workmanship, panel alignment, paint finish, safety-related functions, and a clean vehicle presentation before delivery.
Typical Time Ranges, With Room for the Unexpected
A small dent or cosmetic bumper repair may take two to five business days if parts are available and no hidden damage is found. Repairs involving multiple panels, paint blending, or moderate collision damage often take one to two weeks. Major repairs involving structural work, airbags, extensive parts needs, or insurer supplements can take several weeks or longer.
These are planning ranges, not guarantees. The most useful question is not simply, “When will my car be done?” Ask what stage the repair is in, whether all parts have arrived, whether insurance has approved any supplements, and what remains before quality control. Online repair tracking and direct updates can give you a clearer picture than a date offered too early in the process.
How You Can Help Keep Repairs Moving
Your response time can matter. Provide your claim number, insurer contact information, registration details, and preferred contact method as soon as possible. Review estimates and authorization requests promptly, and let the shop know if you have rental return deadlines or transportation needs.
It also helps to remove personal items from the vehicle before repairs begin. Keep a copy of claim documents and take note of any pre-existing concerns you want discussed. If you notice a delay, ask for an explanation rather than assuming the work has stopped. Often, the team is waiting on an approval or part while advancing every other available step.
For drivers throughout the Coachella Valley, CatCity Auto Body provides detailed estimates, insurance claim assistance, rental support, repair-status updates, and certified collision repair focused on safety and quality. Whether the damage is a dented fender or a major impact, every vehicle deserves careful attention.
After an accident, the fastest repair is not always the best repair. Choose a shop that explains the process clearly, keeps you informed when conditions change, and does not compromise on the work needed to help you return to the road with confidence.