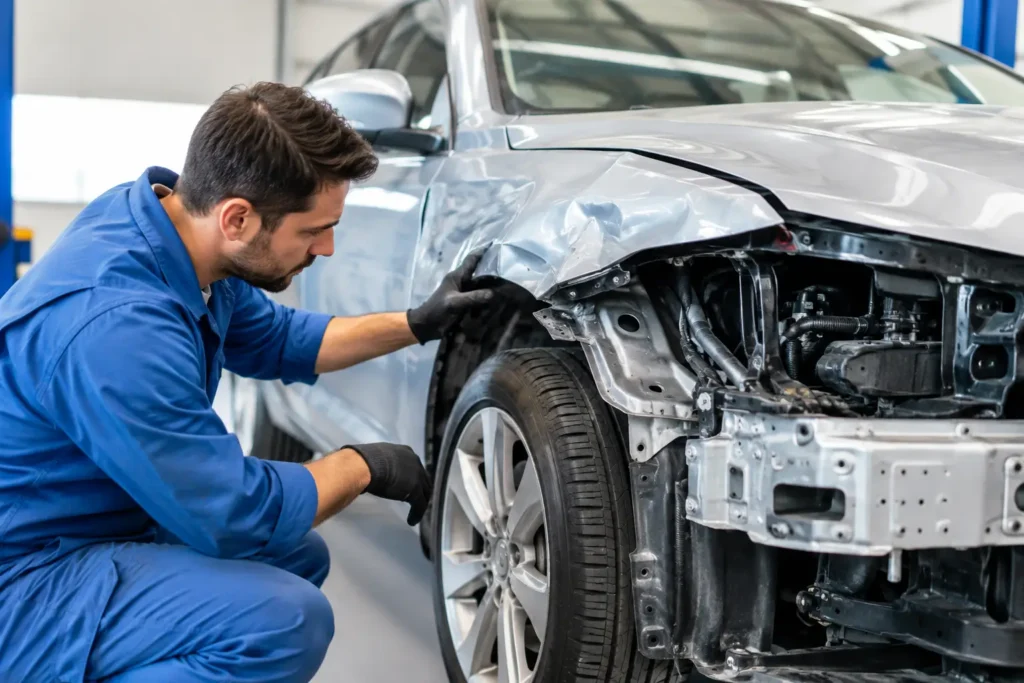
A side-impact collision can leave a vehicle looking repairable at first glance: a crushed fender, a damaged door, and a scraped bumper. But a structural damage repair example often starts with what cannot be seen from the outside. The force of an impact can shift mounting points, bend reinforcement sections, or affect how body panels, suspension components, and safety systems align. That is why a proper collision repair begins with a detailed inspection, not a quick cosmetic estimate.
For drivers in Cathedral City, Palm Springs, Palm Desert, Rancho Mirage, and throughout the Coachella Valley, understanding the process can make a stressful situation more manageable. Structural repair is not about making a vehicle look normal again. It is about restoring the foundation that helps it drive, protect occupants, and perform as intended in another accident.
A Structural Damage Repair Example: Side-Impact Damage
Consider a late-model SUV hit on the driver’s side at an intersection. The visible damage includes the front door, rear door, lower rocker panel, front fender, and wheel. The vehicle can still move, but the driver’s door catches when it opens, the steering wheel is slightly off-center, and there is a noticeable gap between the door and fender.
Those symptoms raise questions that cosmetic repair alone cannot answer. Did the rocker panel absorb and transfer impact energy? Has the lower body structure shifted? Is the front suspension damaged? Are the door hinges, striker, or pillar areas still positioned correctly? A certified repair facility investigates those questions before deciding which parts can be repaired and which must be replaced.
In this example, the repair plan may include a replacement front fender and doors, structural work to the rocker area, suspension inspection, alignment, corrosion protection, refinishing, and calibration checks for affected vehicle systems. The exact plan depends on the manufacturer repair procedures, the severity and direction of the impact, vehicle age, and the condition of the parts after disassembly.
Step 1: Inspection Goes Beyond What You Can See
The initial estimate provides a starting point, but technicians often find additional damage after removing exterior panels, trim, and damaged components. This is called a supplement when insurance repairs are involved. It is not automatically a sign that something went wrong. Hidden damage is common because modern vehicles are designed with layers of reinforcements, brackets, sensors, and energy-absorbing components behind the painted surfaces.
In the SUV example, removing the doors and rocker trim may reveal a bent inner reinforcement and distorted mounting locations. The repair team also checks the wheel, tire, suspension, and underbody for impact-related damage. A vehicle can have a straight-looking exterior while critical areas beneath the panels are out of specification.
Clear communication matters at this stage. Vehicle owners should receive an explanation of the visible damage, the likely next steps, and any changes discovered during teardown. A detailed estimate should distinguish between repair labor, replacement parts, paint materials, and any necessary mechanical or calibration work.
Step 2: Measuring the Vehicle Structure
Structural repair relies on precise measurements, not visual judgment. Technicians use computerized measuring equipment to compare key points on the damaged vehicle with manufacturer specifications. These measurements show whether the structure has moved and help identify the safest repair path.
For the side-impact SUV, measurement may confirm that the lower rocker section is displaced while the main pillar structure remains within acceptable specifications. That distinction is significant. If a component can be repaired according to manufacturer procedures, repairing it may preserve more of the original vehicle structure and control costs. If it cannot be safely restored, replacement is the better choice.
This is where experience and proper equipment matter. Pulling a damaged area without measurement can create new alignment issues. Accurate structural correction supports proper panel fit, door operation, wheel alignment, and the placement of safety-related components.
Step 3: Straightening and Replacing Damaged Components
Once measurements and repair procedures are reviewed, the vehicle is secured on dedicated equipment. Controlled pulls are used to return repairable structural sections to their specified position. This work is deliberate. The goal is not to force metal into a shape that appears close enough. The goal is to restore identified measuring points and prepare the vehicle for approved repairs or replacement sections.
In this structural damage repair example, the technician straightens the affected rocker reinforcement using measured pulls. Because the doors sustained significant intrusion damage, they are replaced rather than filled and reshaped. The damaged fender is also replaced. New parts are test-fitted before paint work begins so the gaps, contours, and openings can be checked.
A quality repair may also require manufacturer-approved welds, adhesives, rivets, or other attachment methods. Modern vehicles can combine high-strength steel, aluminum, and composite materials. Each material has different repair limitations. Using an incorrect process can compromise strength, corrosion resistance, or the vehicle’s intended crash performance.
Step 4: Mechanical, Safety, and Calibration Checks
Collision forces do not stop at the body panels. In the SUV example, the front wheel was hit, so the repair team inspects steering and suspension components. A bent wheel, damaged control arm, worn tire sidewall, or shifted alignment angle can affect handling even after the exterior has been restored.
After structural and body work, the vehicle may need wheel alignment and verification of any advanced driver-assistance systems affected by the repair. Depending on the vehicle, this can include cameras, radar sensors, parking sensors, blind-spot monitoring, or steering-angle sensors. Some systems require calibration after a collision, a windshield replacement, suspension repair, or changes to the vehicle’s alignment.
Not every accident requires every calibration or mechanical procedure. The right work depends on the vehicle’s equipment, damage location, diagnostic results, and manufacturer requirements. What should never be optional is confirming that required safety-related procedures have been completed before the vehicle is returned to service.
Step 5: Refinishing and Protecting the Repair
Once the structure and replacement parts are properly fitted, the refinishing process begins. The repaired areas are prepared, primed, sealed, painted, and clear-coated to match the vehicle’s color and finish. Adjacent panels may be blended when needed to create a consistent appearance in changing Coachella Valley sunlight.
Appearance is only one part of this stage. Structural repairs must also be protected from moisture and corrosion. Technicians restore seam sealers, cavity protection, undercoating, and other protective materials where required. Skipping those details may not show up immediately, but it can reduce the durability of a repair over time.
Before delivery, the vehicle should receive final quality checks. Doors and liftgates should open and close correctly. Panel gaps should be consistent. Warning lights, lighting, glass, trim, and repaired systems should be checked. The vehicle should also be cleaned so the owner can review the completed work with confidence.
What Vehicle Owners Should Ask After a Major Collision
You do not need to be an automotive expert to protect your interests after an accident. Ask whether the vehicle will be measured for structural damage, whether the repair follows manufacturer procedures, and whether any safety-system scans or calibrations are needed. It is also reasonable to ask how hidden damage and insurance supplements will be handled.
Be cautious about choosing a repair based only on the lowest initial price or the fastest promised turnaround. A smaller dent repair may be straightforward, but structural collision damage requires time for inspection, parts availability, measurements, repairs, paint curing, and final verification. The best repair plan balances efficiency with the work needed to restore safety and quality.
At CatCity Auto Body, every repair receives careful attention from certified technicians, whether the damage is limited to a bumper or extends into the vehicle’s structure. If your vehicle has been in a serious collision, request a free estimate and ask for a clear explanation of the repair plan. Knowing what is being checked, repaired, and verified can help you move forward with greater confidence.